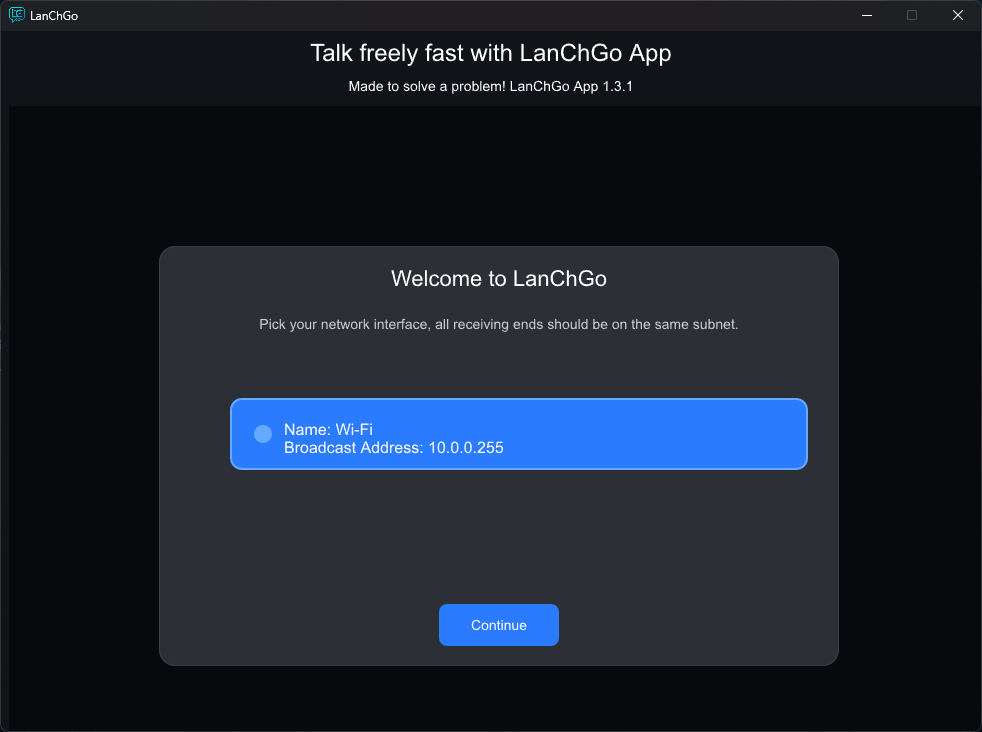
When you open the app this is the first screen you see. Choose your network interface — all connected devices should be on the same network.
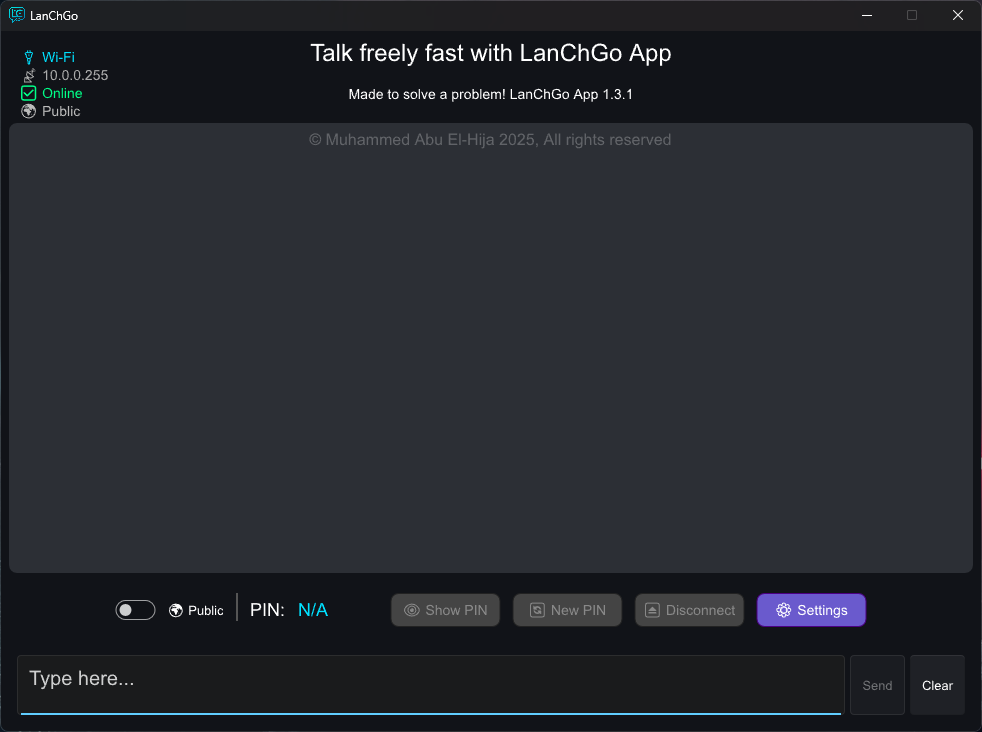
This is the main screen where you can send messages, clear the chatbox, and view the network state in the upper-left corner.
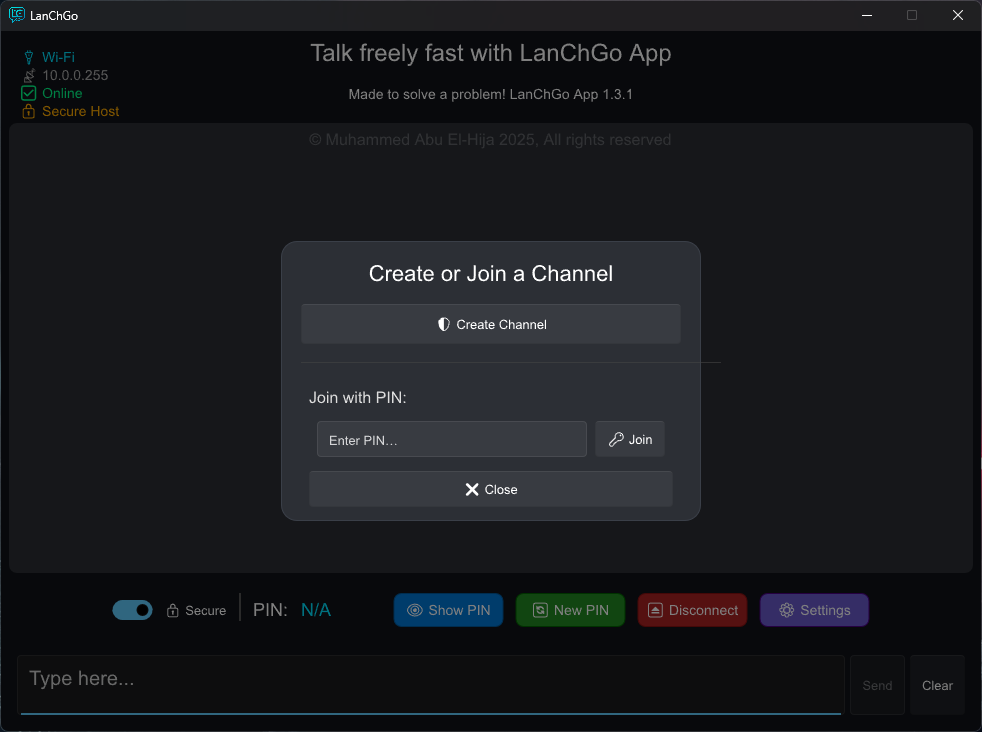
Flip the switch to create or join a secure channel. A popup will appear asking if you want to create a new one or join an existing one with a PIN.
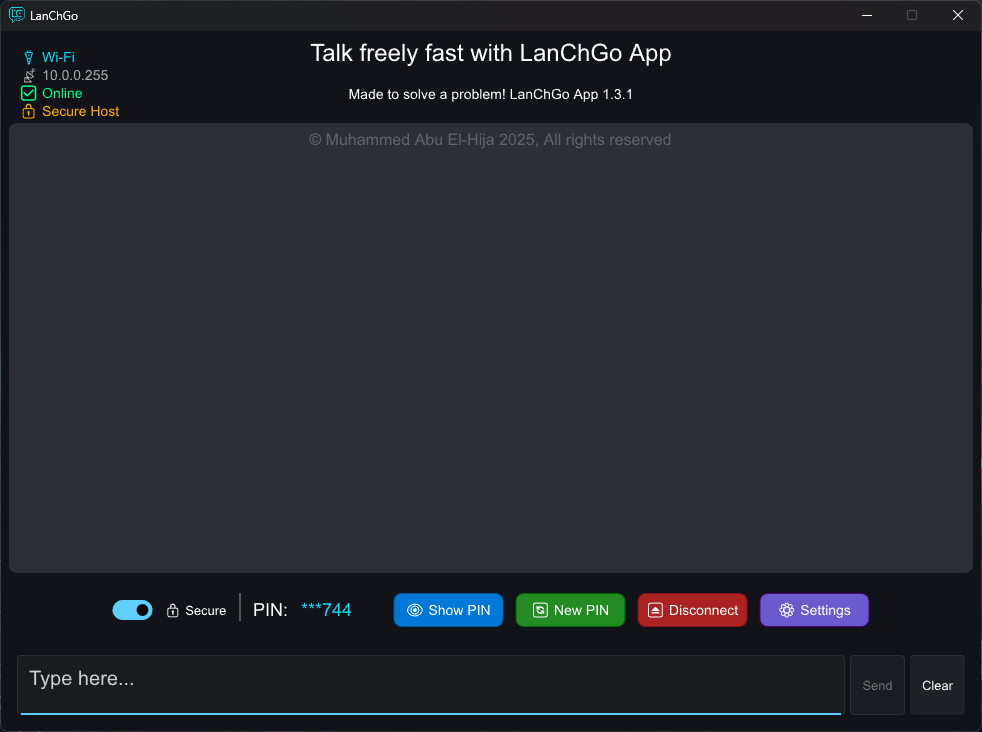
When you create a new secure channel, you'll get a random 8-digit PIN — your connection key. You can show, regenerate, or disconnect it anytime.
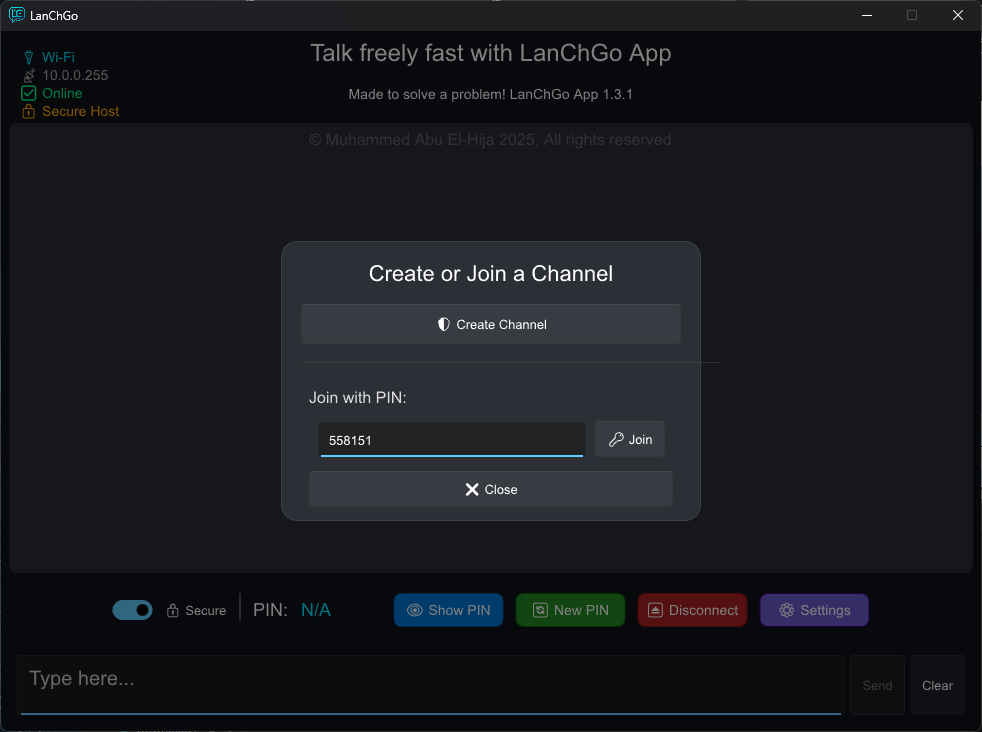
To join an existing secure channel, flip the switch, enter the PIN, and click connect — you'll be linked automatically.
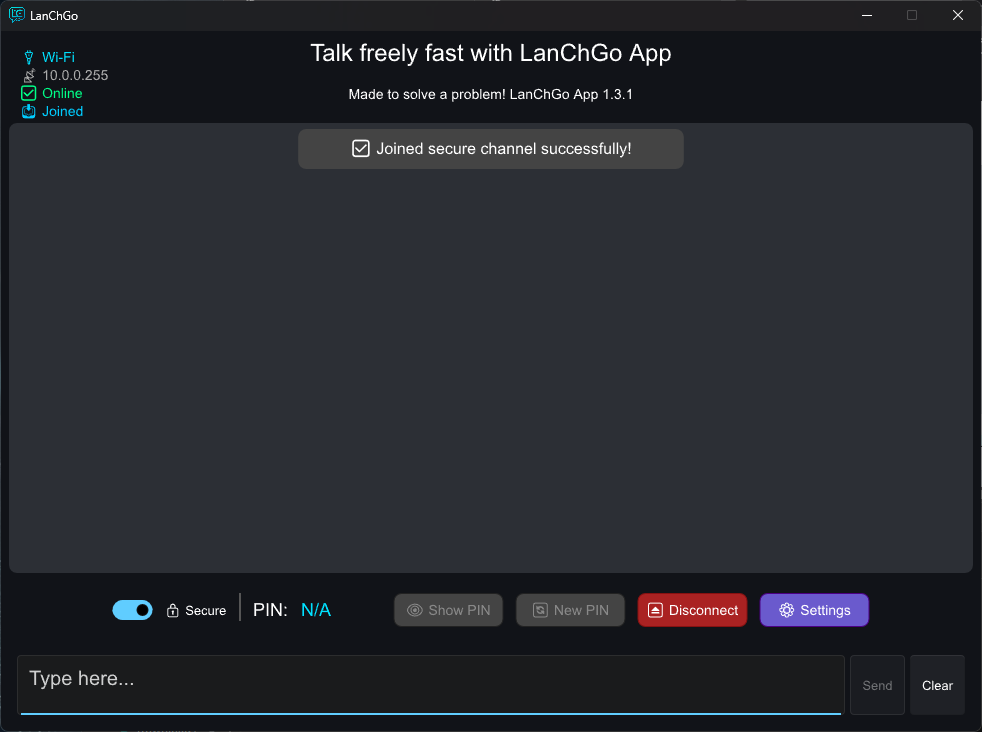
After joining, you'll receive a confirmation message with sound feedback. You won't be able to view the channel's PIN for security reasons.

Clicking Show PIN displays the channel PIN along with a QR Code that you can scan to connect an Android device directly.